How to Get Rid of Double Chin in Photoshop

How To Remove Double Chin in Photoshop

In portrait photography or any model shoot, perfection is the key to achieve the client’s satisfaction. Perfecting a portrait shot is not easy as some of you might think. It needs perfect photography lighting, professional camera, best camera settings for portrait photography, make the frames right, and use poses from the right angles.

One of the common issue that every portrait photographer face is the double chin problem. The only way you can remove double chin in the post-processing using photoshop. So how to fix double chin in photoshop? What is the easiest way to remove a double chin in photoshop?

In this article, I will go through a photoshop tutorial that will help you to remove double chin from your portrait photo. Without further delay let’s get started.

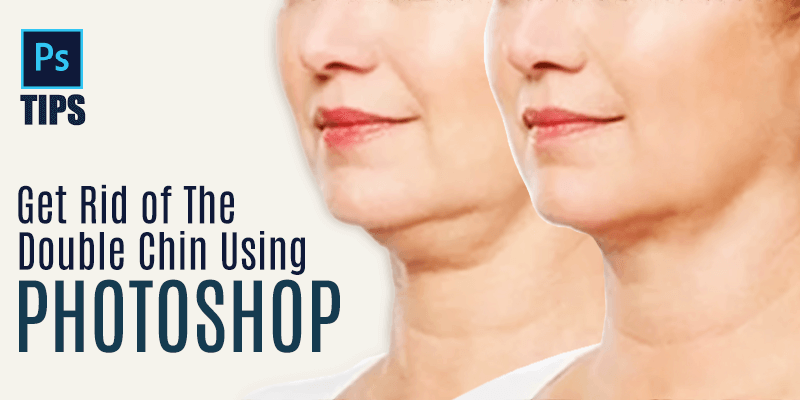
Before you start editing the first thing you need to do is to look at the chin area of the image that we are going to edit. Why? Because it is possible that you might edit the chin are more then it needs. We do not want to give our image an unrealistic look, right? See the above picture and explore the area of the chin. Don’t focus on a person’s general look, but be careful about how the pixels differ across different parts of the face and neck.

We have to keep in mind that the neck area under the chin section is more likely to look dark because of the shadow that is created due to the chin. But in the above image, you can see that the chin and the neck have almost the same lighting and color. So we need to use shadow creation service on the neck area to make it darker.

How To Remove Double Chin in Photoshop Tutorial

Fixing the double chin is an image reshaping process which is also called photoshop liquifying technique. Below I will show you how to fix double chin in photoshop with 11 simple steps.

Step 1: Insert the image in the photoshop and make a duplicate layer of that. This ensures you do not make changes to the original picture. To create a duplicate layer of the original image click on the Layer and select Duplicate Layer. To fix double chin in photoshop, try to create two duplicate layers.

insert the image in the photoshop and make a duplicate layer

Step 2: To remove the double chin photoshop liquify tool is an important photoshop tool that we will use. To select the liquify tool go to the top menu bar and select Filter > Liquify, or by clicking Shift + Ctrl + X

Liquify image

Step 3: From the liquify menu select the Forward Warp Tool. As we will fix double chin which is a part of the face, the forward warp tool is ideal to modify facial functions.

Forward Warp Tool

Step 4: Before going into the actual image editing we have to prepare the image first. Photoshop enables you to adjust the tool Size, Density, Pressure, and Intensity. Depending on your picture, the most suitable values will vary, so play with the setting until you are satisfied with the way it works.

adjust the Density, Pressure, and Intensity

Step 5: After preparing the image we are ready for the actual editing which is to get rid of a slight double chin. Use the forward warp tool and fix the areas we need to.

We can do that by dragging and clicking on the chin areas. Don’t go too far in making the edits. It is necessary to keep the effects as realistic as possible so that you are unable to get taken away.

get rid of a slight double chin. Use the forward warp tool

Step 6: Next, we need to add some noise that will work as a subtle texture. To do this we should create another layer as we do not want to ruin our work till now, right?

But there is a change that we need to make in this layer that is, we need to fill this layer by gray color. To do this go to the Edit menu and select Fill. A window will pop up and from there edit the settings like below:

add some noise for subtle texture

Contents: 50% > Gray Mode: Normal > Opacity: 100%

Step 7: Now that we have created a gray layer, we are ready to add the noise. Go to Filter menu then select NoiseAdd Noise. A window will appear where you can adjust the noise amount and apply it to the neck area. Apply the noise according to your requirements.

adjust the noise amount and apply it to the neck area.

Step 8: After adding the noise we have to blur it so that it won’t look very harsh. Choose Filter > Blur > Gaussian Blur from the bar at the top of your screen to apply the blur.

apply the blur option

Based on the size of the picture the correct value will change again. The bigger the radius, the blander the layer. The more the layer blurs, the more prominent the effect. Feel free to experiment with this environment until you have a look you ‘re pleased with.

Step 9: Now it’s time to add a shadow on that area. But before we need to add a clipping mask and to do that just Right-click on the Layer menu and select Create Clipping Mask.

Create Clipping Mask

Step 10: Now it’s time to use the shadow creation technique. It will help to make us the image look more realistic. To add shadow to the image we need to create the curves adjustment layer. To do that go to the Layer menu and then New Adjustment Layer then select Curves.

go to the Layer menu and then New Adjustment Layer then select Curves

Select the point you want to make darker and then drag the curve down to see the result. Stop when you get the desired result you want.

Now to add a realistic shadow add a Layer mask to this layer and filled it with black. Now start to create the shadows where you want and in our case, it will be the neck and chin.

Select the point you want to make darker and then drag the curve down to see the result

Step 11: This is the last step and in this step, all you need to do is repeat the last step but this time nor for darken the are but for lightening up some area. This means creating an adjustment layer, selecting the curve but this time instead of dragging down the curve, we will drag it up.

remove the double chin and you have learned how to remove a double chin in photoshop

So there you go, you remove the double chin and you have learned how to remove a double chin in photoshop.

Apart from the photoshop tools, I have used in this tutorial there are a few more tools that you can use to trim down the double chin in photoshop. Photoshop Stamp tool and dodge & Burn tool can also be used to get rid of the chin

I hope you like the tutorial and wish you the best of luck to try it for yourself but remember if you need any professional help we are here for you all the time

Navaho Mizsey

Navaho Mizsey

Author

“Navaho Mizsey is a Content Writer Executive with 5+ years of experience. He is a hardworking and talented writer. He writes what the audience wants to read. He completed his degree in journalism and started his career in content writing. He loves to write about photography, camera, and photographer”
No Comments

Leave a Reply

Quick Response

Email:
cs@theclippingpathservice.com

Hotline Support:
Mobile:       +1 (718) 717-2362