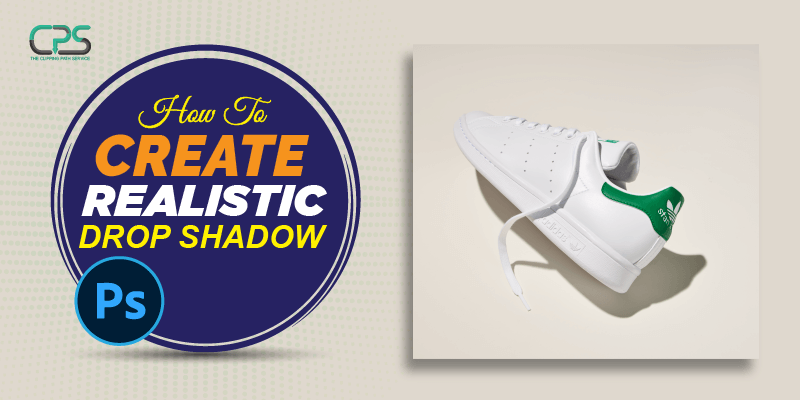
How To Create Realistic Drop Shadow

How To Create Realistic Drop Shadow

Photoshop shadow effect can enhance the visual experience of a photo just by adding shadow to it. Among all the shadow effect services, the realistic drop shadow is the most used one. The realistic drop shadow effect makes an image look natural, more professional, and trustworthy.

Today we will learn how to create realistic drop shadows in photoshop. Of course, it’s better to do it yourself when you have personal images rather than looking for someone else to add a drop shadow to your image. You can find multiple methods for shadow creation in photoshop, but not all of them are simple and easy to grasp.

I will explain what a drop shadow ( you can call it photoshop box shadow also) is and how you can create a realistic drop shadow in the upcoming segment.

Photoshop drop shadow is a photo editing effect that a photoshop expert uses on the images to make them more believable and stunning. You can use these images for making product catalogs, advertising, and web pages. Typically, the photoshop shadow effect has two categories: cast a shadow and form shadow.

Photoshop cast shadow is when the shadow of the subject is cast on the surface of a photo. And on the other hand, form shadow is the shadow that is seen within the object itself. The major points you need to keep in your mind while adding shadow to a photo are the direction, distance, and several light sources you have.

Why is the photoshop drop shadow effect important?

Photoshop drop shadow effect changes images drastically and increases their quality. In addition, the effect can provide a picture with an exclusive and breathtaking look. So photoshop’s drop shadow effect is essential for the images that need to impress their audience. 

Businesses like product photographers and retailers, fashion and magazine agencies work best to produce gorgeous and trustable photos. And so, the realistic drop shadow InDesign effect is like an indispensable ingredient for them.

How to Add a Realistic Drop Shadow In Photoshop

Knowing how to add a shadow in photoshop is not mandatory, but as the effect is prominent, there is no harm in finding out about it. So without further delay, let’s get started.

Step 1: Open image in Photoshop

Image 1

You can use any subject-focused image for this tutorial, or you can choose a product image as we did.

First thing first!!!

Insert the image you have selected in photoshop. You can drag and drop the image on the artboard of your photoshop, or you can go and click on File, then choose Open to select the image and hit the Insert button.

Step 2: Remove background from image

Image 2

I could skip this step, but I wanted to keep this tutorial a one-stop solution for those who want to know how to add realistic drop shadows in photoshop. First, we must remove the background from the image before going into adding the drop shadow.

You can use any selection tool to select the background and use the background eraser to isolate the subject from its background. However, I would suggest you use the clipping path technique by using the Photoshop pen tool for the selection process to get it accurate and professional. 

Step 3: Create Duplicate Layer

Image 3

After removing the background from the image, we now have to create a duplicate layer so that the original layer remains intact. To create a duplicate layer in photoshop, we need to select the original layer and press Ctrl+J as a duplicate layer photoshop shortcut. You will get a replica layer underneath the original one in the layer panel. Click on the newly created layer and drag on the top, which will act as our foreground now.

Step 4: Change the foreground color

Image 4

Now we will change our foreground color into black. You can change it using the photoshop keyboard shortcut ( Ctrl+X) or adjust it manually. First, click→ Set Foreground Color from the toolbar and select the black color from the color panel.

Step 5: Make The Duplicate Layer black.

Image 5

In this step, we will turn our duplicate layer into black. To do that, first, we will select our layer by clicking on it and then press Shift + Alt + Delete. Our duplicate layer image will turn black, which we will use in our photoshop drop shadow effect.

Step 6: Create The Shadow

Image 6

Now we will create our realistic drop shadow using the black portion we have made in the previous step. To create shadows, we have to use the free transform tool by keeping the duplicate layer selected press Ctrl+t to bring the transform tool. 

With the tool, you can move the black portion anywhere you want. But as we are here to create a drop shadow, and generally, drop shadow sits under the subject. So we will shrink the black part and place it under our subject. 

Click and hold right at the top middle portion of the transform tool and bring it down to create the shadow effect. Now click on the duplicate layer and drag it under the original layer to look like a drop shadow.

Step 7: Position The Shadow

Image 7

Positioning the photoshop drop shadow effect is essential, or it won’t work as the drop shadow. Use the transform tool to perfect the position, and when you get the correct position, press the “Enter” button or “Return” to get out from the “Free Transform Tool.”

Step 8: Use Motion Blur

Image 8

Use the motion blur effect on the shadow to reduce the harshness and blur the edges of it. Go to Filter>Blur and select the Motion Blur option. A popup window will appear. From there, adjust the angle and distance according to your requirement. After adjusting them click OK to keep the changes.

Step 9: Apply Gaussian Blur

Image 9

After using the motion blur now, we will apply gaussian blur to the scene. You can select the Gaussian Blur photoshop from the Filter→ Blur menu on the top. After selecting, a window will come up, and from there, we need to adjust the radius. I would suggest you use 3 px for the perfect shadow smoothening.

Step 10: Add Layer Mask

Image 10

Now we need to create a layer mask in the duplicate layer before we use the brush tool. To add the layer mask, we will click on the “Layer Mask” button from the bottom of our layer panel and select the “Add Layer Mask” option. 

Step 11: Use brush tool to bring perfection

Image 11

In this last step, we will use the brush tool to make our shadow perfect. First, go to the toolbar at the left and find an icon with a brush on it. Click on the icon, and a drop-down menu will appear. From there, select the Brush Tool.

After selecting the tool, set the opacity level around 50-60% before starting using it. Now change the background color to black and fix the brush size according to your requirements.

Now drag the brush tool over the shadow to make it smooth and realistic looking. If you overdo it, change the background color to white and paint it over that area with the brush tool again to retrieve it.

By repeating this back and forth process, work until you get your desired amount of drop shadow.

What’s Next!!!

When you are done, save the image and use it wherever you want. Learning how to create realistic drop shadows in photoshop is not mandatory, but it can offer you some significant advantages in the long run.

Image 12
Navaho Mizsey

Navaho Mizsey

Author

“Navaho Mizsey is a Content Writer Executive with 5+ years of experience. He is a hardworking and talented writer. He writes what the audience wants to read. He completed his degree in journalism and started his career in content writing. He loves to write about photography, camera, and photographer”
No Comments

Leave a Reply

Quick Response

Email:
cs@theclippingpathservice.com

Hotline Support:
Mobile:       +1 (718) 717-2362