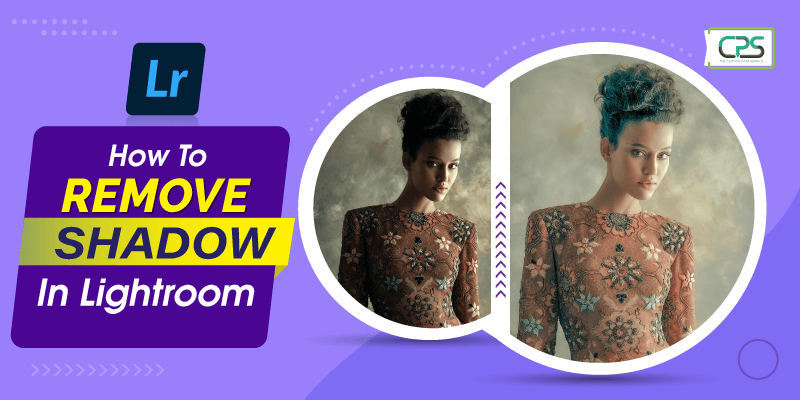
Proven Steps on How To Remove Shadows In Lightroom

First, open your image on the Lightroom software. You could drag and drop or import images from the library module. Afterward, check into the “Develop” section from the built-in interface.

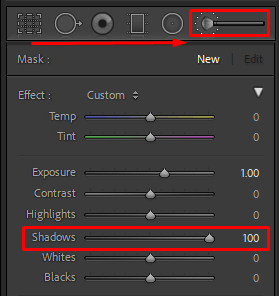
Now you would get a bunch of controlling sliders. Find out the “Shadow” slider and drag it to the right. Make sure the value is set to +100.
Once you are done, check out the “Highlight” slider and decrease it down to at least -40.
To make the image more balanced you need to further increase the “Exposure” slider. But don’t increase the value too much, as it could burn out the image.
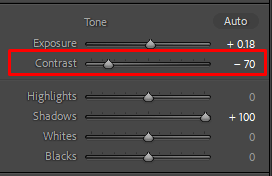
As an optional step, Decrease the “Contrast” option a bit. It increases detail in the image which helps you make the image look natural.
Note: All of the following effects are global adjustments. This means the changes could affect the whole image at once.
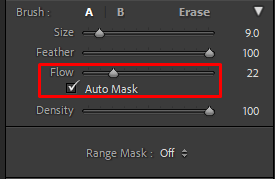
Now you need to use a Lightroom adjustment brush tool to remove the shadows which are available on your photos. You could find the Brush tool option at the top part of the Develop panel in the Lightroom interface.
Before you start with the brush tool, you need to configure the settings in the right format.
Brush Settings: At first set the feathers of the brush to the highest amount. Afterward, increase the shadow parameter to +100 as well. Don’t forget to turn on the Auto-Mask features of the brush as well. Press the “O” from Keyboard to turn on the overlay. It would help you to see the area where you have brushed in. Lastly, customize the brush size and opacity of the brush to your likings.
After you set up the brush set, zoom into the image area with shadow. Now start brushing onto the shadows. Keep brushing until you cover the shadow area. In the end, you could turn off the overlay to check the result.
Using a brush tool you could remove shadows on the face, skin, and surrounding areas.
Note: If you want to remove extra brushed areas, turn off the Auto-Mask, and turn on the overlay. Then brush on the areas you want to remove.
As you brush on the areas with shadows, sometimes the areas might get unwanted contrasts. Which can create uneven contrast between the brighter and darker areas of the image.
To improve the image contrast, use the Lightroom brush adjustments.
Check out the “Temp” slider at the adjustment settings. Drag the temp slider to the right side which contains the Yellow-colored area.
It would blend the contrast of the images to make it look more natural. Make sure you don’t pull the slider too close to the right edge.
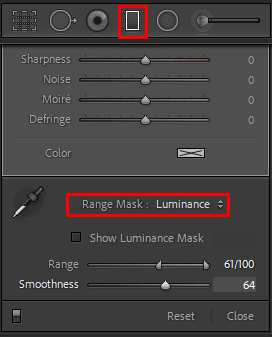
With the range mask technique, you could help you out to remove the brush adjustments from the brightest image areas. In the following technique, Lightroom calculates image luminance and determines image areas where the effects should not be applied.
Note: It would help you to remove the dark shadow without affecting the over-saturated areas of the image.
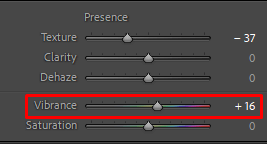
As a final step, find out the “Vibrance” slider in the Lightroom interface. Click and drag the slider to the right side. It would improve the vibrance of the overall image. Make sure you don’t drag the slider too much as it could damage the image aesthetics.
Once you complete the final touch upon your image, save the image file. To export the edited image, go to File > Export. Afterward, select the Hard Drive at the “Export To” section and choose the destination. Click on the Export button at the end.

Emma Rivett
Author
“Emma Rivett is a brand photographer and copywriter who has a strong tendency to prepare, change and teach. Her photographic works were published in Uppercase, Travel + Leisure, Gayot Guide, Paula Deen Cooking, Design Guide, the NHOME Magazine, Urban Home, etc. Helping creative businesspeople create an online brand and PS”

No Comments