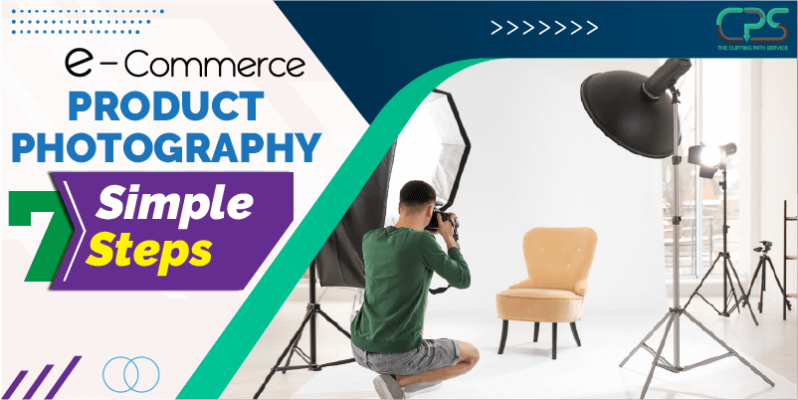
How to Shoot E-commerce Product Photography in 7 Simple Steps
Attractive visuals have higher power to persuade customers. This is why a perfect eCommerce product photography always works like magic. And, in the following guide, I am going to show you how to shoot e-commerce product photography in 7 simple steps.
It’s super easy to follow. Even if you are a beginner, it would be a perfect one to start out with. Don’t hesitate, everything would be smooth. And you would master product photography. So, let’s get into it.
Table of Contents
ToggleWhy Should You Learn E-commerce Product Photography Techniques?
E-commerce is booming nowadays. And it’s the future. The key element of e-commerce is product photography. In Threekit’s case study on E-commerce product photography — most of the mobile users are attracted to visuals. They determine buying decisions based on images rather than looking up for texts.
Which is why you should master the technique of professional product photography. It improves your conversion rate and customer attention span of your shop. A good product photography would hook up customers and persuade them to buy from you.
E-commerce Product Photography in 7 Simple Steps
Ready to take awesome e-commerce product photos which entice customers to buy? You need only 7 simple steps. It’s easy, fast and provides you great results. And these are techniques best product photographers always use. Let’s start the process.
Step 1: Organize & clean up your product

First, understand the range of products you are going to shoot. Organize them according to their sizing and category.
Suppose, you have different types of products. Sort them according to the sizes and categories. Afterwards, set up your shoot in-line to your product sizes.
And most of all, clean up your product so it won’t look dirty. If you are shooting apparel, make sure you iron them in first place. As a result, your superstar — the product — would be ready for shoot.
Step 2: Prepare shooting space

The shooting space is where all magic happens. Don’t panic, it’s not expensive to create. You only need a few things to start.
These key elements are:
- DSLR/Phone camera
- Tripod/Stable base
- Shooting desk
- Soft Lights/Sunlight
- Backdrop
- Reflector/Shiny surfaces
That’s what you need to set up a basic shooting environment.
Don’t worry if you have a low budget. You can still manage to take magnificent eCommerce product photos.
How?
While most of the basic equipment is low cost, you can also use alternatives which I mentioned.
But I would suggest to go for primary elements, in case you have the budget. Because it offers better results on your photo.
Step 3: Set Your Camera

Whether you have a decent DSLR camera — Sony a7R II or Nikon D850 — or a phone camera, set it in the correct way. Make sure you have focus, zoom, and other settings in perfect parameters.
If you have a DSLR camera, configure these options:
- ISO: On your camera setting, lower the ISO to 100. It creates an ideal depth for product photography.
- Shutter Speed: Make sure you set the Shutterspeed to higher numbers. It would help you to avoid any kind of blurriness.
- White Balance: My advice to don’t play with White balance. Set it to “Automatic”. So your camera itself would determine which options look good.
- Aperture: Always set the aperture higher as possible. Because it lets you capture the photo with richer depth. Which is good for eCommerce product photos.
Step 4: Place your tripod & others

When you have a decent DSLR or smartphone camera on hand. It’s time to place it in the right position.
- First, fix your camera on a tripod. Then take the shooting desk and move it in front of the camera lens. Make sure both aligned in a straight line.
- Now, set your product at the focal point of the camera. have you any product photography props? Arrange them in photo composition in the correct way.
- In the case of sidelights, place them beside the product. If you want to use natural light, place your shooting desk at the side of the window.
- At last, place the reflector on the opposite side of the natural light(in the case of natural lights).
So, that’s how you set up a professional photography studio. Nonetheless, make sure your shooting table has a pain background. And it should have a smooth transition from a vertical to a horizontal plane.
Step 5: Manage your lighting

It’s time to review the lighting basics before you start going into the action.
But which light to use?
If you have a budget of 50$, a decent softlight kit would be great. The best alternative to softlight is natural light. And it would work fine for eCommerce product photography.
To get proper lighting, set the shooting table right next to a big window. Also, shoot during the day. To be specific, at noontime. As a result, you would get the most natural light in the photoshoot.
Once you set the lighting, start the camera. Sneak into the lens. And perform a test shoot.
Step 6: Start Shooting Photos

According to the ASOS Case Study, most of the hitpoint of customers goes on to product images. This is why you should try to shoot and add as many photos as possible. And you must also shoot photos with different angles.
The case study also proves an interesting fact. Different varieties of high quality eCommerce photos increase the conversion rate. And it’s true indeed.
So, you should give all your attention to the shooting process. As a result, you get the best product photo for e-commerce. Don’t rush off. Take your time. And get photos with different angles as well.
Step 7: Post production

Once you complete shooting all product images, it’s time for the final process. The post production.
On post production, you fix out all the imperfections from the product images. And it’s a must-do step in professional product photography. Because it makes your photo as professional as possible and minimizes all the errors.
You can try basic retouch and editing on photos. But it is often time consuming and requires higher skills. So, it’s not productive for you as a one-man army.
This is why outsource product photo editing is the best way. Services like CPS provide professional, fast, and affordable photo editing.
Don’t have the budget? In fact, the following agency offers you a convenient pricing package.
Photo editing services work like magic. I promise, your E-commerce images would look 100x professional. And ready to convert viewers into buyers.
Additional Questions
You may have extra questions in mind about Ecommerce product photography. I am going to answer you all. It would clear up your concept of the photography process. So, let’s answer them one by one.
Should I use a lightbox?
Do you know? 90% of the product image quality comes from its lightning — says Iconasys. It’s a 360 product photography software firm. They also added, you should use a lightbox with only small scale and high reflective products. For example, jewelry items would be the best fit for softbox usage.
But there’s a catch.
Softbox gives you constant lighting all the time. Which won’t let you be creative with light changes. Most of all, sometimes it creates over exposure — which is beneficial only for small scale products.
Should I invest in product photography props?
It’s time to think about the photography props, right? It’s not essential but works to decorate your image composition.
You should not invest into the props if it’s not necessary. If you are working on food, beauty and luxury products, you may add a little bit of props. But remember, always be simple and don’t go for the fancy way. It would work great for you.
How to be the best product photographers?
To be the best product photographer, you must follow some rules. Let me explain some points on it.
- Make optimal camera settings
- Create proper lightings
- Use right equipments
- Create a perfect storage system.(tethering, if possible. Will talk about it in the next section).
- Make sure post-production of your photo.
If you maintain these points while shooting, the result would be a perfect product image. And the product photo would look like photos of best product photographers.
How to boost shooting time?
Natural Lights Vs. Studio Light

Let’s talk about each part, one by one.
Natural Lights
You should master the use of natural light first. In fact, it’s also gets used in professional product photography,
Why?
Because it provides you flexibility and depth on each photo. A natural light always wins the look and feel. But it also comes with some backlash.
Let me explain to you.
Suppose, you fixed all the shooting setup besides a window. It’s nice to shoot it. But, if your product has a clear reflective surface, it would reflect the window and the setup.
Which is why, I would suggest you to go for a professional Ecommerce photo editing service. It would help you to retouch the product photo and make it look professional.
Studio Light
Let’s be straight, studio light has some sort of cost. You have to make an investment. And before making any sort of investment, check twice on whether you would need it or not.
If you are going for studio lights, get a lighting kit. If you are starting out, a kit of 50$ would be a game changer.
But, wants to know the best thing?
A studio light would let you capture professional shots. And it would also let you perform different product photography techniques.
In short, it’s a little bit expensive, but provides you perfect output. But still, I don’t recommend using one, in case you just started the photography journey.
Conclusion
Let’s be honest. It was an in-depth ecommerce product photography guide for you. And it shows, setting up an awesome shooting setup is not hard. You only need a little bit of dedication with a positive mindset. I am sure you would master all the product photography techniques in a few tries.
And don’t panic if you don’t have soft lights. Many people like you, create exceptional product photos, only using natural light. And these photos also convert viewers into customers. So why wait and watch? take the action and be a great e-commerce product photographer.

Emma Rivett
Author
“Emma Rivett is a brand photographer and copywriter who has a strong tendency to prepare, change and teach. Her photographic works were published in Uppercase, Travel + Leisure, Gayot Guide, Paula Deen Cooking, Design Guide, the NHOME Magazine, Urban Home, etc. Helping creative businesspeople create an online brand and PS”
Categories
- Image Guidelines (12)
- Post Production (8)
- Pre Production (27)
- Review (16)
- Tips (51)
- Tutorial (18)
Recent Posts
Quick Response
Email:
cs@theclippingpathservice.com
Hotline Support:
Mobile: +1 (718) 717-2362


No Comments