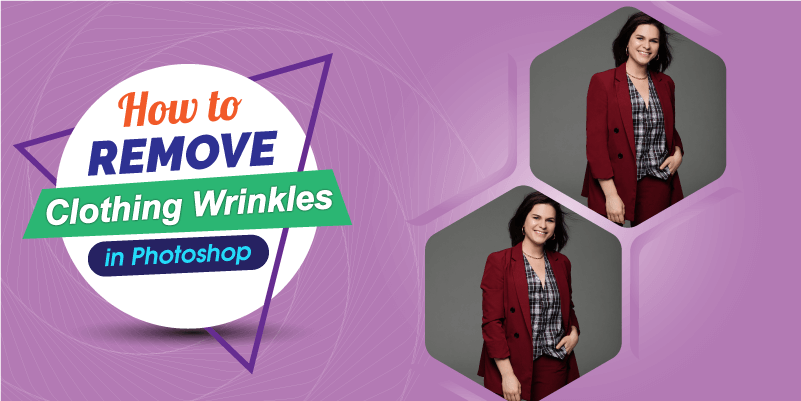
How To Remove Clothing Wrinkles in Photoshop
Removing clothing wrinkles is a must if you want a distraction-free image. Thus, with simple photoshop tools, you would remove clothing wrinkles faster than ever.
These are the steps to follow:
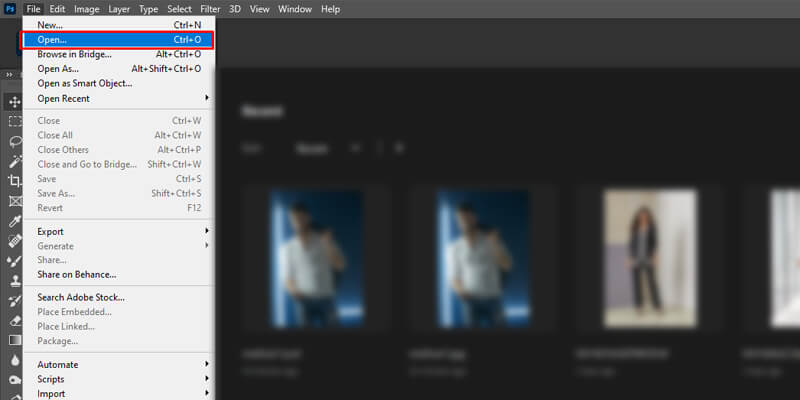
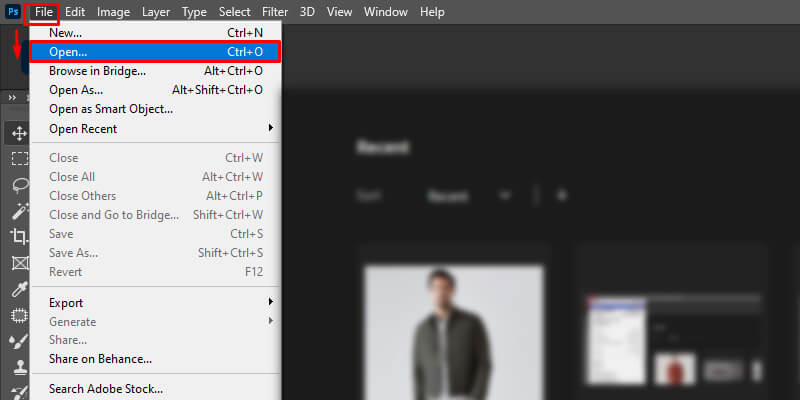
Step 1: Open up Adobe Photoshop on your device. If you don’t have the software at first, download it out.
Step 2: Go to File > Open, choose the image you want to edit. Or drag and drop the image file itself into Photoshop.

Step 3: Once you open the file, Zoom into the wrinkles you want to fix.
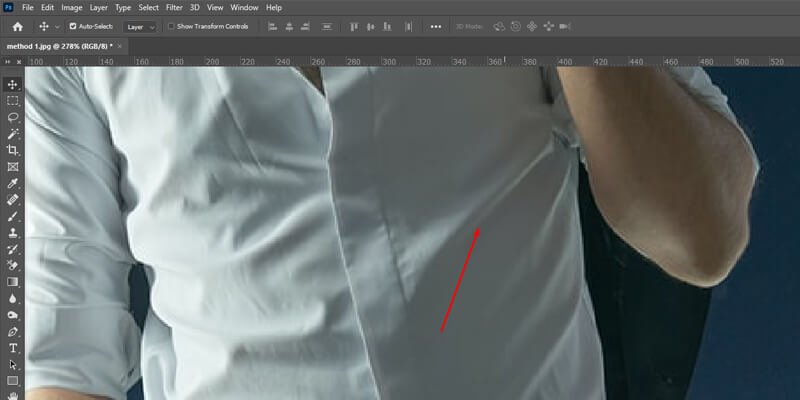
Note: Press the “Z” key to start using the zoom tool.
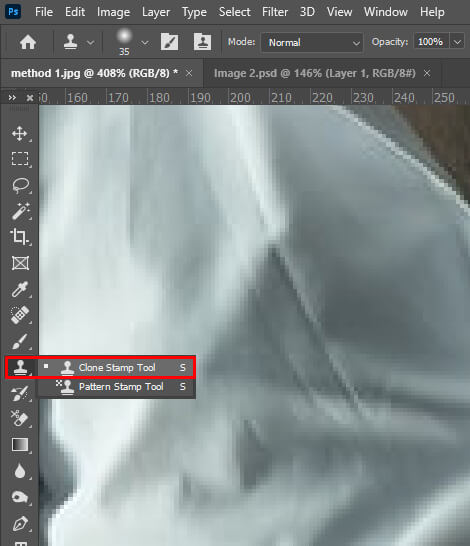
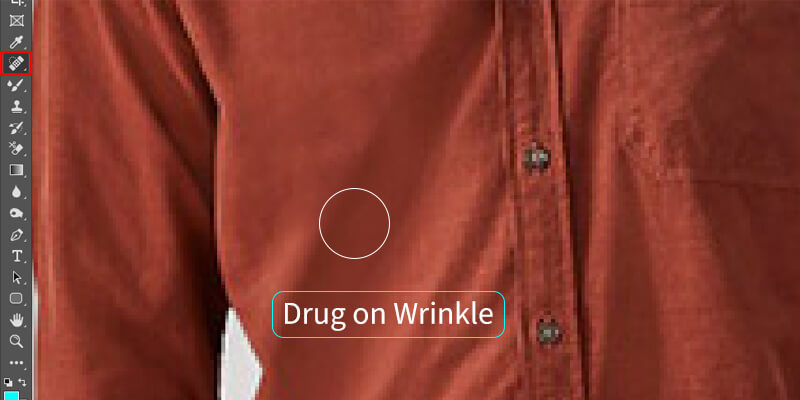
Step 4: Click on the Clone stamp tool icon. Or you could press the key “S” to activate the tool.
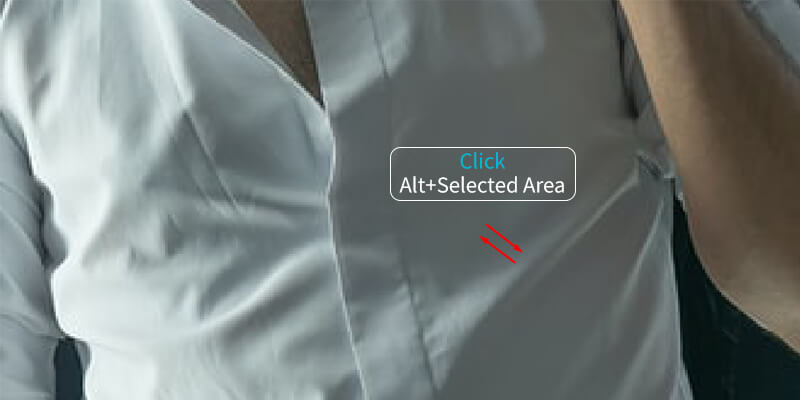
Step 5: At first, press “Alt” and click on any surrounding area of the wrinkle. It would let you sample that particular area. Now, fix the size of your brush. Press opening and closing the third bracket key to make the brush are bigger and smaller.
Step 6: Once you are happy with the brush size, start brushing out the wrinkle with care.
Note: Make sure you sample from other surrounding spots while brushing. It would help you to avoid any repetition.
Step 7: Once you are done, apply the same process for other wrinkles as well.
So, these are the steps you should consider removing any wrinkles. According to most veteran Photoshop experts, the clamp tool is the best tool to remove wrinkles. That’s why you must try it before using any other tools and techniques.
As I have mentioned, the Clone tool of Adobe Photoshop is the best way to deal with wrinkles. But you have other options as well. If you don’t feel comfortable with the clone tool, check out these tools to fix your wrinkles.
Let’s try out these tools one by one:
Using Patch Tool
Patch tool is a simple yet efficient tool to in Adobe Photoshop remove clothing wrinkles.
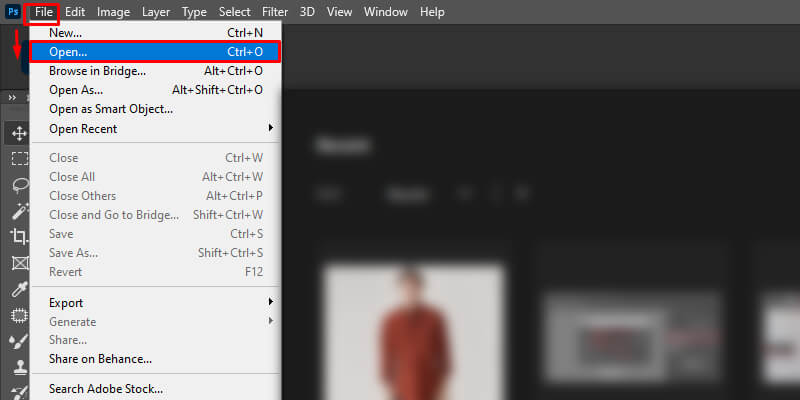
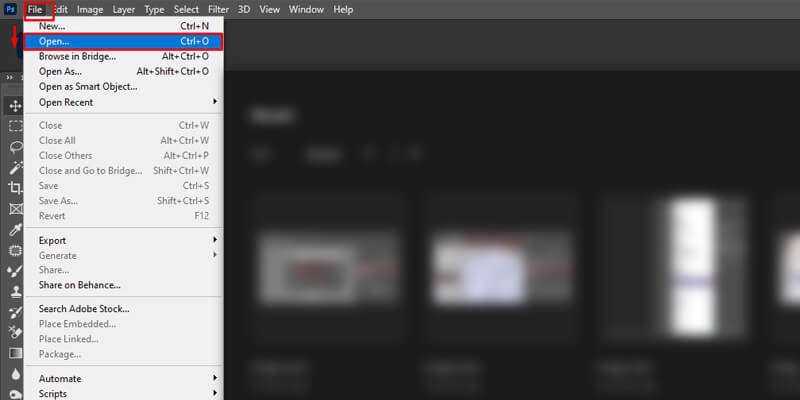
Step 1: Open your Image, File > Open.
Step 2: Click on the Patch tool icon from the left toolbar.
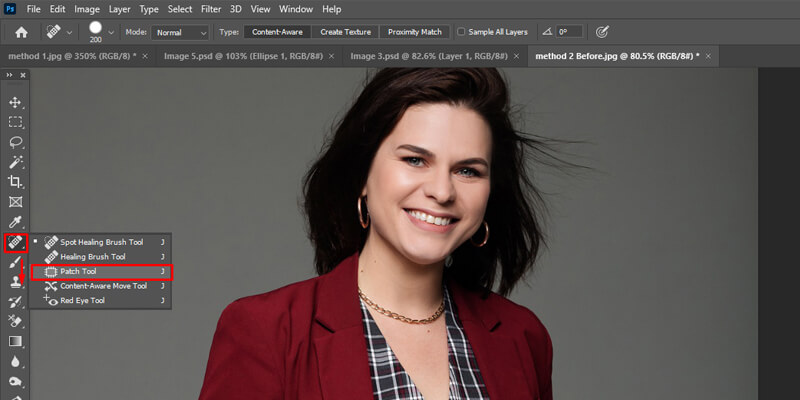
Note: If you don’t get the patch tool icon, right-click on the spot healing brush tool icon. Then select the Patch tool from the drop-down.
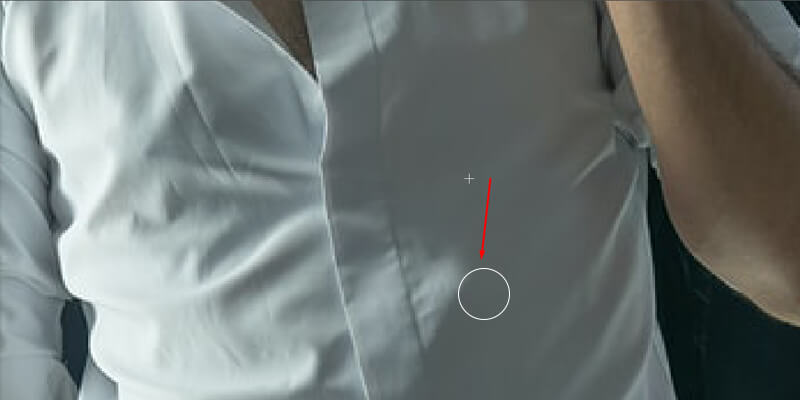
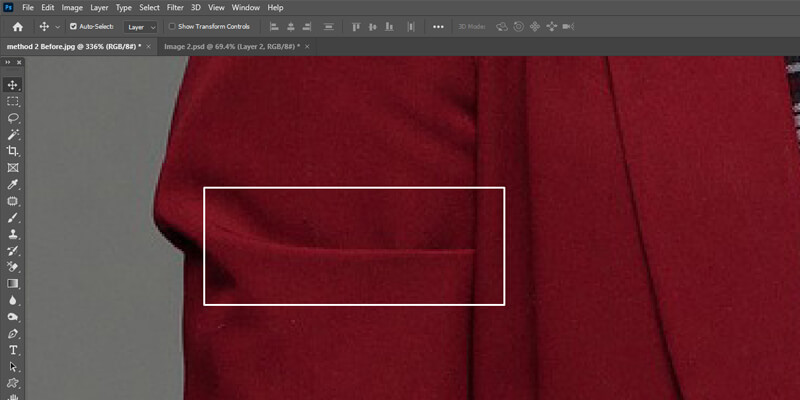
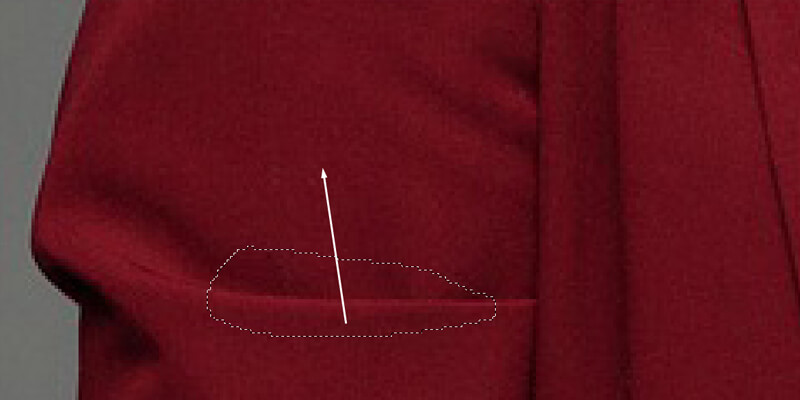
Step 3: Zoom into the clothing wrinkle and draw a circle covering the boundary of the wrinkle.
Step 4: Then click and drag the selected area to a plain surface of the clothing.
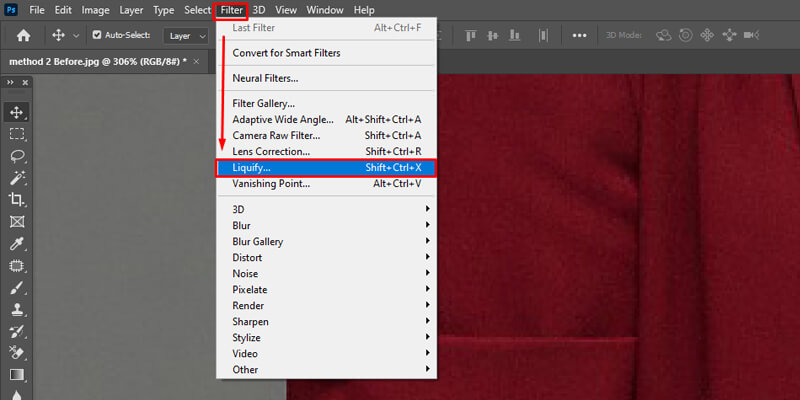
Step 5: To eliminate the outer binding fabric of your model use liquifies features. First, go to the Filter menu > Liquify.
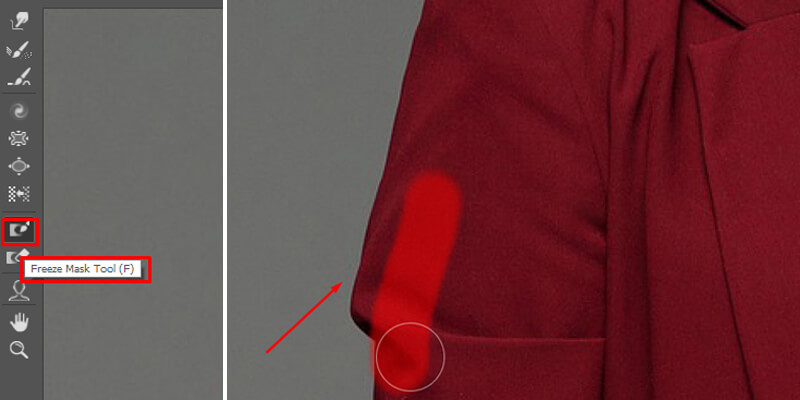
Step 6: Then another window will open up. Click on the Freeze Mask Tool or press F. Brush up the edge of the clothing. After that click on the Forward Warp Tool. Brush the outer binding fabric towards the fabric lining. That’s it.
Step 7: Done, your clothing wrinkle and bendings have vanished.
It’s an amazing and simple tool to remove wrinkles with minimum affordance. When you are in a hurry and need a quick fix, the following tool can get you out of trouble.
Step 1: Open your image in Adobe Photoshop.
Step 2: Click on the Spot Healing Brush Tool icon. Now adjust the brush size by pressing the third bracket(opening and closing) keys.
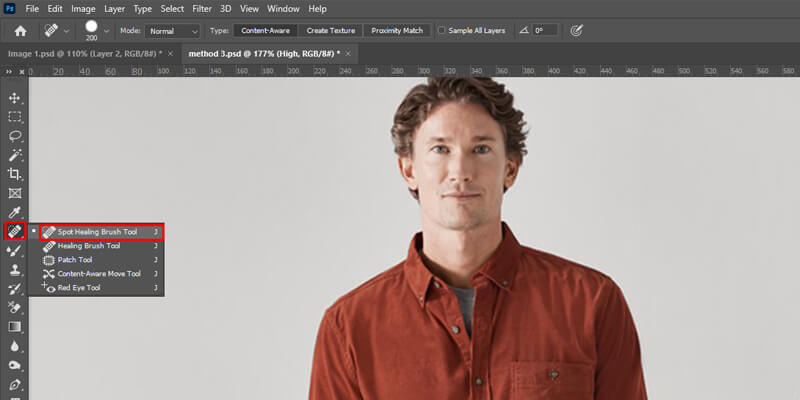
Step 3: Once you are happy with the brush size, zoom into the wrinkle. Brush over the wrinkle. Make sure you start from the edge of the wrinkle. The tool would determine the correct texture according to the surroundings.
Note: Don’t overdo the brushing; otherwise, it might discolor the brushing region.
If you are not satisfied with the automatic pixel sampling, use the healing brush tool. It lets you sample a particular spot to brush up on the clothing wrinkle.
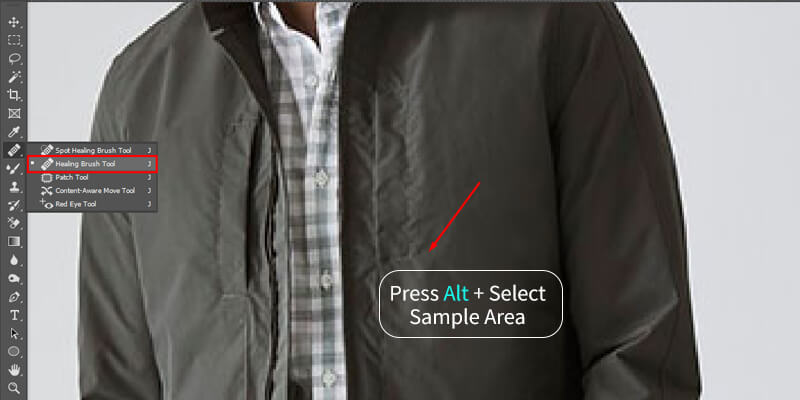
Step 1: Open your image in Photoshop.
Step 2: Click on the healing brush tool. Can’t find the icon? Right-click on the Spot healing brush tool icon and select the healing brush tool from the drop-down.
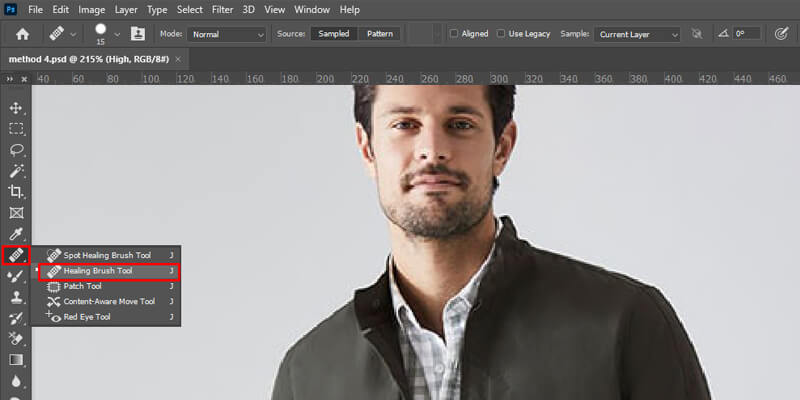
Step 3: Now press Alt + Left click at once to sample any area around the wrinkle. Once you have got the sample start brushing over the wrinkle.
Note: With the Healing Brush Tool selected, you would get several customization options. At the upper panel, you will get options to change the brush’s size, flow, mood, and spacings. So, use them when appropriate.
You could try out an advanced way to remove clothing wrinkles. It’s called frequency separation. Therefore, the technique is for pro users. Yet must try it out if you are not getting pleasing results with default Photoshop tools.
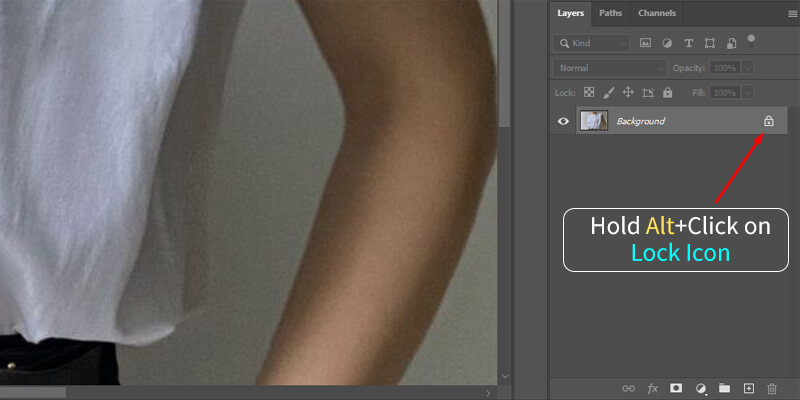
Step 1: Open your Image.
Step 2: Unlock the current image layer by clicking on the lock icon while pressing the alt key.
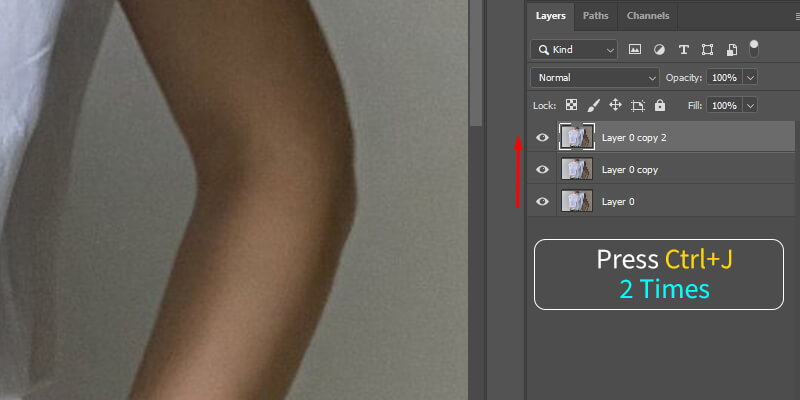
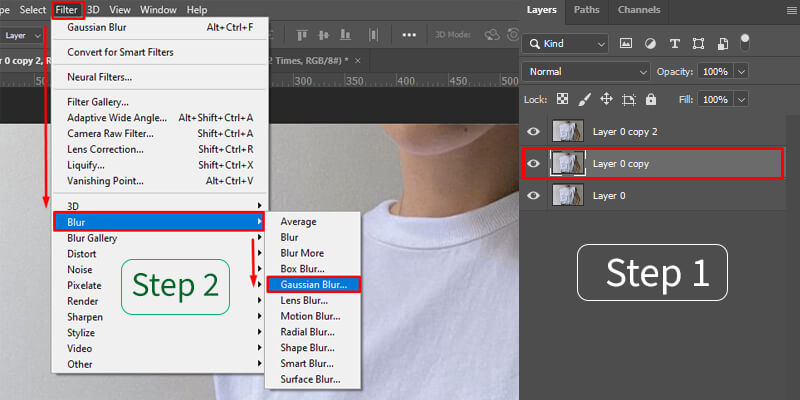
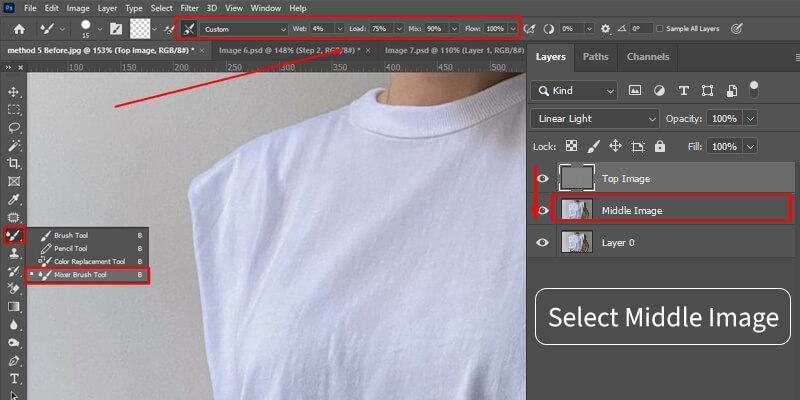
Step 3: Press Ctrl + “J” key twice to duplicate the current image into 3 total layers.
Step 4: Select the middle image layer. Then go to filter > Blur > Gaussian Blur. Choose the blurriness where the wrinkle is not showing clearly. And Press Ok.
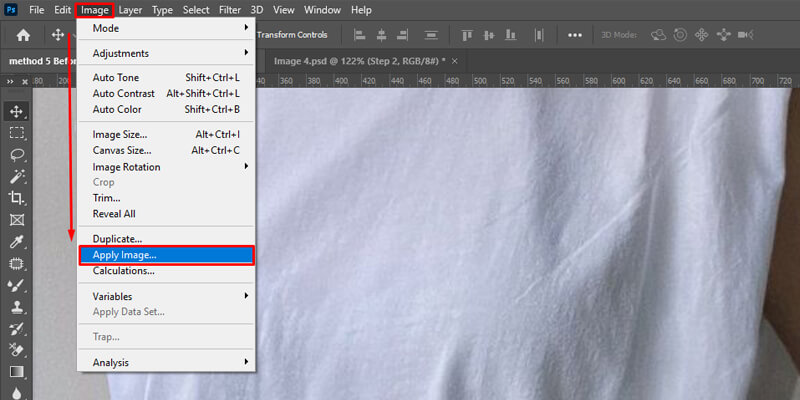
Step 5: Select the top image layer. Go to image> Apply image.
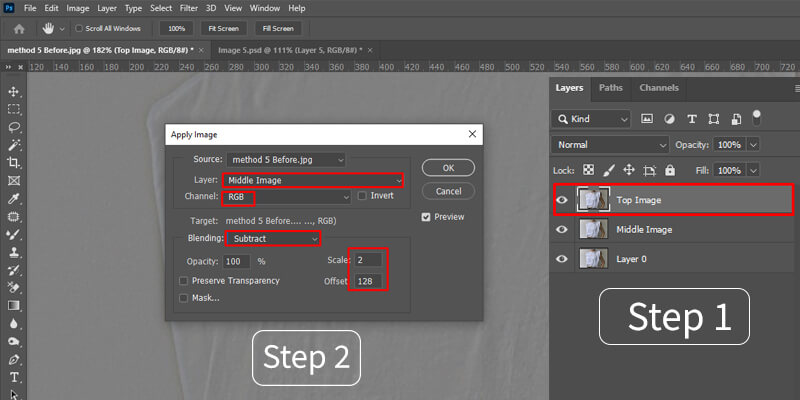
Step 6: Now, on the Layer section, choose the middle layer. Choose the blend mode to “Subtract.” Set scale to 2 and offset to 128. Click Ok.
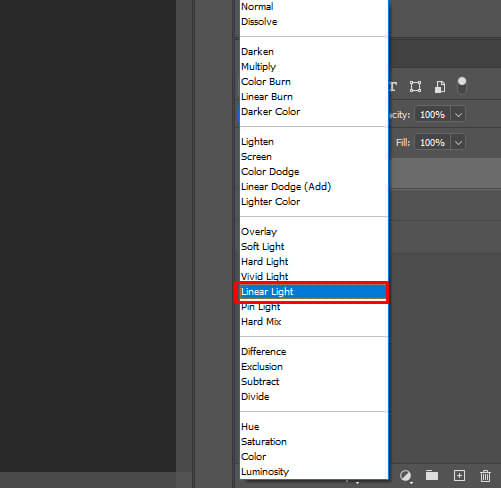
Step 7: Afterward, click on the top layer and change the layer mode to Linear Light.
Step 8: Finally, click on the “Mixer Brush Tool” and start bruising out the wrinkles. That’s it.
Note: The following technique would not work on all sorts of images.

Bordie Capron
Author
“Bordie Capron is a Sr. Content Maker who is working in The Clipping Path Service an US-based image and video post-production company for over 7+ years. She completed her degree in graphic designing and worked as a graphic designing expert for several years. She always loved writing”

One Comment
David
Your sharing information is very helpful. Undoubtedly it is helpful for us. Thank you for your important sharing.