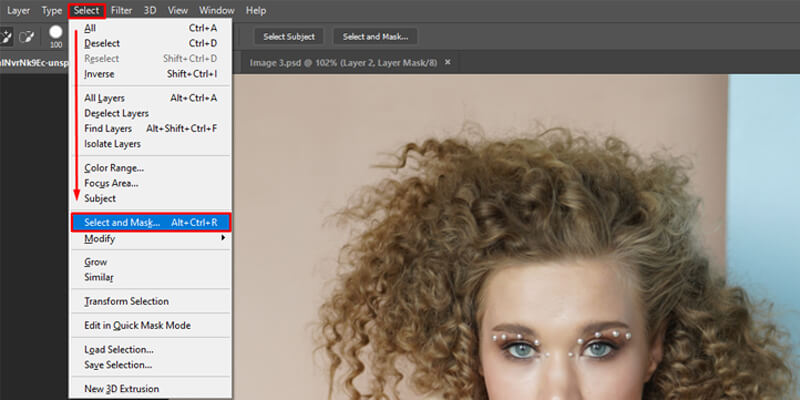
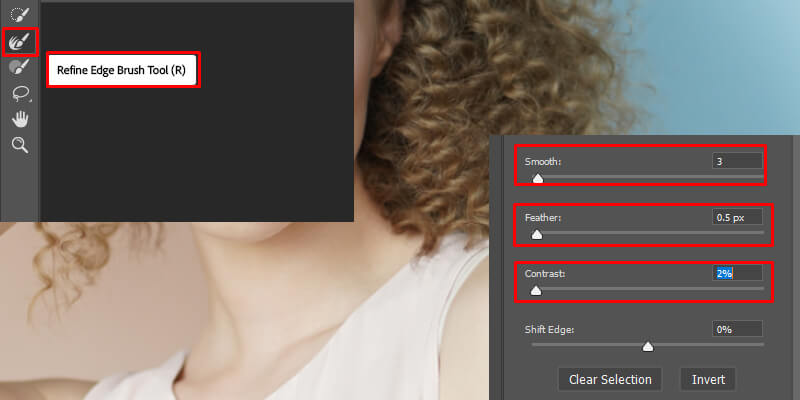
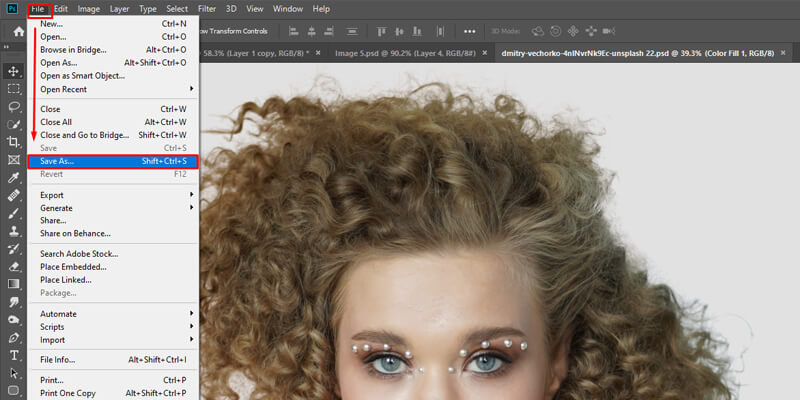
How to Smooth Edges in Photoshop

Navaho Mizsey
Author
“Navaho Mizsey is a Content Writer Executive with 5+ years of experience. He is a hardworking and talented writer. He writes what the audience wants to read. He completed his degree in journalism and started his career in content writing. He loves to write about photography, camera, and photographer”

No Comments