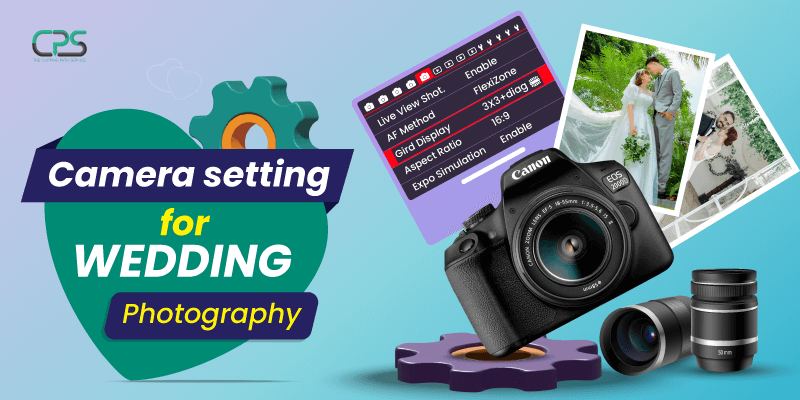
As a professional wedding photographer, you undoubtedly know that your camera is only a tool. Beautiful photographs are the result of your expertise with the camera. That’s why taking good wedding photos requires knowing how to properly set, change, and manage your camera’s settings.
Let’s look at some of the standard settings for the camera when it comes to wedding photography.
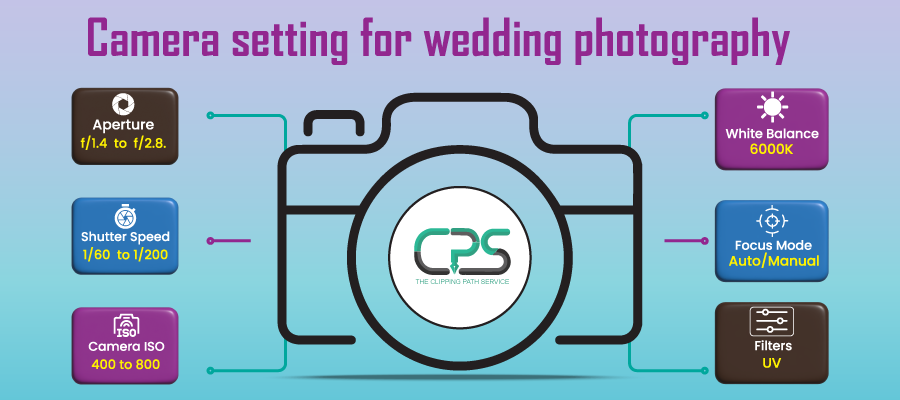
1. Aperture
While shooting a wedding, the aperture is a crucial camera setting. Simply put, the aperture is the lens’s opening determining how much light gets to the sensor. For low-light conditions like indoor wedding ceremonies and parties, a wider aperture (lower f-number) will let more light into the camera.
Also, a small fraction of the image will be in focus when employing a wider aperture. This can be helpful when creating portraits or a hazy and dreamlike background.
In contrast, a higher f-number (a narrower aperture) will let less light into the camera but provide a greater field depth. This helps take pictures of huge groups of people or expansive landscapes.
Generally, the ideal aperture for shooting bridal couple portraits is between f/1.4 and f/2.8.
2. Shutter Speed
Another crucial camera option for wedding photography is shutter speed. The shutter speed controls the sensor’s light exposure. A faster shutter speed will freeze motion, making it excellent for photographing moving subjects like the first dance or the bouquet toss.
In order to catch the bride’s dress whirling down the aisle or to create the illusion of movement in the background, a slower shutter speed is required.
If the camera is not held stable, a reduced shutter speed can cause fuzzy photographs; hence a tripod or other stabilizing device is highly recommended.
Moreover, shutter speeds of 1/60 second or faster are necessary during ceremonies to prevent blurring. With the reception likely to include some form of artificial lighting, the best photos will be taken with a shutter speed of between 1/200 and 1/60.
3. ISO
The ISO setting allows you to modify the camera’s sensor’s sensitivity to light. Increasing the ISO setting makes the sensor more light-sensitive, allowing you to take pictures in dim conditions without using the flash.
However, higher ISO settings often lead to increased noise or grain in the final image, which can be distracting or otherwise detracts from the overall quality. The image quality improves at lower ISO settings, but more light is needed for proper exposure.
Overall, To get clear, gorgeous portraits during an indoor wedding, aim to maintain the ISO between 400 and 800.
4. Metering
Metering determines the level of light that reaches the camera’s sensor. This option controls how much light the camera sensor will collect when the shutter button is depressed when shooting in manual mode.
Matrix or evaluative metering modes average the exposure throughout the whole frame. In most cases, this is the ideal option for wedding photography, especially when a mix of bright and dark parts is in the frame.
Spot metering simply evaluates a tiny region in the frame’s center. Spot metering can ensure that your subject is always properly exposed, even in strong contrast or backlighting scenarios. This can come in handy while photographing the bride and groom and in situations with a lot of natural light and gloomy places.
Lastly, the center-weighted average metering prioritizes the visual elements in the middle of the screen. Even if you don’t take many portraits, center-weighted metering can come in handy when photographing large groups of people (like the wedding party) or when the composition isn’t perfectly balanced.
5. White Balance
The camera’s white balance feature allows photographers to adjust the image’s color temperature. Set your white balance for the specific lighting conditions you will be shooting in to prevent unwanted color casts.
Tungsten bulbs, for example, can give your photographs an orange tint, while fluorescent bulbs, a bluish one. While taking images, it’s best to manually change the white balance rather than rely on the camera’s default setting.
The best white balance setting is natural light (5600K). Under cloudy or shaded conditions, a daylight balance of 6000K or higher may be necessary to avoid the appearance of coldness and blue.
6. Focus Mode
In photography, the focus mode determines how the camera settles in on its subject. Single-point autofocus, which lets you choose a precise focus point in the frame, is typically ideal for wedding photography. In case the bride and groom aren’t in the exact middle of the shot, this can help keep their features in focus.
If your camera or flash includes autofocus assist, using that feature in combination with the flash when shooting in low light is ideal. It is also important to ensure that your lens is set to autofocus rather than manual focus unless you intentionally try to create a specific effect.
7. Composition
Choosing the appropriate composition can determine whether or not a photograph is successful. Therefore, it is crucial to set up each frame individually.
Use the rule of thirds, one of the most crucial compositional principles to remember. You can do this by dividing the screen into thirds, either vertically or horizontally. Finally, position your subject at an intersection or along a line to make a more balanced and beautiful photograph.
Using lines to guide the viewer through the frame—which can be anything from a stairway to a road, the veil, or even the bridal party sitting for a picture—is known as leading lines. Your subject will appear more vibrant and engaging if you properly position them in leading lines.
It’s also a good idea to use framing, in which you position components of the scene around your subject, to increase the visual appeal of your photographs. It can involve anything from buildings to trees to arches to doors.
Also, you can improve the aesthetic attractiveness of your photographs and bring more attention to the topic of your photograph by integrating a frame in the layout of your shot.
8. Filters
The ability to take unique photographs stems largely from knowing how to use the many filters in your camera.
A UV filter may reduce harmful UV rays reaching your camera lens. This is the default camera mode for weddings that are being shot outside. This UV filter will also prevent haze or blurring in your photographs.
Once again, a polarizing filter is a lifesaver for outdoor wedding photography, helping you reduce reflections and glare so that the subject matter stands out with rich, vibrant colors. Also, it reduces sun haze and improves photo color.
The third variety, a “neutral density” (ND) filter, is used to lessen the incoming light to the camera’s sensor. Using this, you can control how much light enters your camera, which helps you photograph in intense environments. This feature also gives you greater exposure control if you wish to utilize a slow shutter speed and capture movement in a photograph.
Final Verdict
Wedding photography is one of the most important aspects of any wedding ceremony. When setting your camera for wedding photography, it is essential to check for any faults or missing parts ahead of time.
Additionally, the correct lens selection is as crucial as the proper exposure settings while using a camera. Spend time selecting the best lens companion for your camera because they work together to capture your perfect image.


No Comments