How To Photograph Earrings

How To Photograph Earrings in The Right Way?

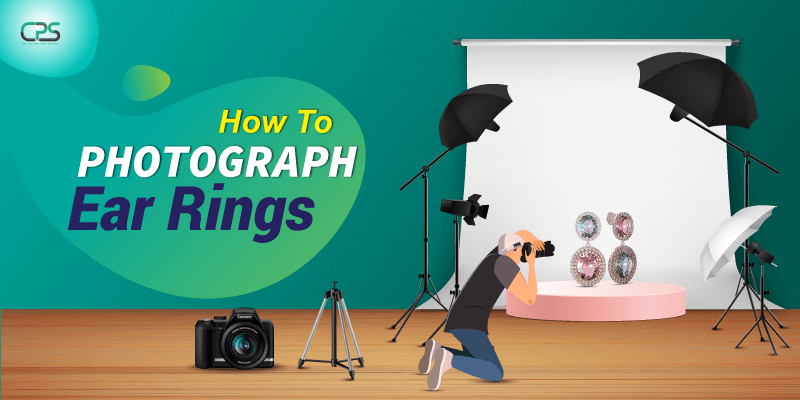
Earrings are small yet intricate to the photoshoot. When you take pictures of these kinds of jewelry, follow our mentioned tips. We are going over the tricks of how to photograph earrings professionally.

In case you have a jewelry shop, capturing quality images is beneficial. It helps you increase sales, conversions, brand awareness, and so on.

Thus, you need to invest yourself in getting better images that work and look great across the platform because it’s helpful from all perspectives as an eCommerce store owner.

Let’s learn all the steps to photograph earrings professionally.

Photographing earrings fall under specific rules of jewelry photography. Yet, you need to put a great effort into making the photoshoot suitable for earring photographs. As small objects like earrings take a certain effort to capture and set up, below mentioned steps can help you a lot.

Clean Out Any specks of Dirt

Clean Out Dirt

In many cases, the earring jewelry can come with a thin layer of Dirt laying on the earring’s surface. Therefore, the first part of photographing earrings is to clean them with clothing. Plus, use gloves while doing photography to avoid putting fingerprints on items.

Microfiber cloth is the best clothing to clean out the earrings. Cleaning the jeweler makes sure it doesn’t look grim. Moreover, it increases the sparkle. Finally, it looks great on a DSLR camera.

Try to Utilize The Natural Light

Afterward, choose a spot with natural light. Utilizing the natural light brings vibrancy into the earring photo. Many jewelry photographers arrange their photography sessions at noon. Thus, you have the highest amount of light to work with.

Set up a table beside the window to get a great ambiance in the photo. If the light is too harsh, use cloth at the window as a diffuser. Alternatively, if the sunlight is insufficient, go for a custom light setup.

Choose The Backdrop Wise Way

Most of the time, photographers prefer the white background for earring photography. You must do so because it provides better results on each photo. Buy out a white sweep paper which is enough to create a background for your photoshoot. 

When the white sweep paper background is not available, use white cardboard. When it comes to the surface, place a reflective surface, but it’s not a mandatory part to go on. Regardless of the color of the background you choose, it must be free of any sort of texture.

Set The Camera Setting

Whether you have a mobile camera or DSLR, you must configure it correctly. For example, if you have a DSLR, the aperture should be higher than usual. Likewise, the ISO setting must be as low as 100 or below. Further, the white balance should be perfect to offer better color. 

Whenever you use a mobile camera, always focus on the jewelry itself. Do not over-zoom the earring as it might pixelate the image. Plus, try out other camera apps other than the default camera of your iPhone or Android device. 

Use The Tripod

Buy a tripod to make your images look consistent and professional. The tripod is a camera stabilization tool and works with DSLR and mobile camera units. So your earring photos will be clear and free of any blurriness. Hence, a tripod is essential for quality photographs.

You have the luxury to take earring photos at the same angle with a tripod. As a pro tip, mark the tripod stands on the floor to get consistent photos. In addition, it helps to improve the photography workflow as you don’t have to hand-held the camera.

Fix The Mannequin

Use Mannequin

At first, try to manage a model for photographing the earring. It’s easier to photograph the earring on the model as well. But, when the model hiring is getting expensive, use a dummy. But before buying out a mannequin, consider the color and look.

The black mannequin is the most popular jewelry image. Though, many photographers prefer using whiter mannequins. As a rule of thumb, the whiter earring suits best on black sculpture. In the same way, the golden color item looks great on white mannequins as well. 

Use String To Hang

Use String To Hang

When a model or mannequin is unavailable, get a string to hang the earring. In such cases, find cardboard to create a hanging platform. If the cardboard doesn’t have a white background, take a white sweep paper and cover the board with it. Or buy an earring photography stand which is available at your nearby shop.

Hence, tape or glue to make the paper stick to the cardboard surface. Further, use a string that is easy to remove in the post-production phase. Yet it should be strong enough to bear the weight of the earring. It’s a fast hack that every jewelry photographer follows.

Setup The Lighting In Proper Way

Earring Lighting In Proper Way

After you set up the photography base, start arranging to light. If the natural light is not enough, place at least one LED lighting from a 45-degree angle. While using the 45-degree angle lighting, point the camera string to the earring.

For better lighting quality, set up two separate LED or contentious lights. It helps you to smoothen the shadow creating excellent photographic output. Or, as the last step, you could photograph earrings in lightbox units.

Mistakes To Avoid When Photographing Earrings

Below we are going over the rookie mistakes that might go out of your eyes. Checking out these points would make sure you have top-class images right away.

  • Detailed Focus: While capturing earrings with a macro lens, don’t focus on a certain part of the earring. Instead, focus on the whole earring piece. In turn, it lets your customers zoom into all details of earrings. Thus, while setting the earring, keep it in mind.
  • Color Correction: It is often an underrated task, yet you need to perform proper color correction of your earring. Either you need to do it yourself or outsource a jewelry photo editing service. Don’t avoid the issue. It makes the earring image blanched and colorful at the same time. 
  • Avoid Group Photos: Don’t try to capture more than one pair of earrings on the same image. It distracts the web visitor and forces them to look for other earrings. You should not include a necklace or other jewelry within the set. 

Things To Follow To Improve Earrings Photography

Want to improve earring photography? Follow our below mentioning tips to get ahead in your jewelry photography career. Let’s start.

Related: How to Photograph Jewelry for Etsy

Work On Zooming

Perfect zooming can help you to improve your earring photographs right away. To achieve precise zoom on the earring, always use microlens. These lenses are perfect for creating perfect jewelry images. Among the best lenses, Nikon lenses are one of the best.

Keep Everything Minimal

Be minimal while setting up the props around your earring. You don’t need to scatter many things within your earring photograph. Keep the composition simple and minimal while placing your props. Remember, the less is more when you place things in the photo.

Use Real Models

Real models bring massive value to jewelry images. Because the audience gets to relate to the photo, making the picture more appropriate and realistic. It helps you to attract more audiences to your eCommerce website. 

Go For 360 Photography

To offer an intensive look into your earring, use 360-degree photography. Sure, it’s a bit expensive, but it helps you increase conversion. Your web visitors will have the option to zoom in and rotate images increasing engagement. 

Retouch Jewelry Images 

High-end jewelry retouching can improve your existing earring photography tenfold. You only need software such as Photoshop to apply high-end retouching and polishing. The result of photo retouching always gives you a polished and shiny earring. As a result, it looks both on and off the screen.

FAQs for Earrings Photography

Below are the questions which might be roaming into your head. Let’s get a close look and start answering all of them.

How To Capture Jewelry Images To Share On Social Media?

When capturing jewelry images for social media, keep the format in mind. While adjusting the angles, think about whether it would look great on your targeted social media. Plus, your image should be interesting and complete to gather organic engagement. 

How To Create A Jewelry Photography Studio At Home?

To create a pro photography studio at home, you need a decent camera, tripod, white sweep paper, cardboard. These are enough to arrange a professional photography studio for yourself. Further, you want to improve the photo, try out custom lighting, high-end jewelry image editing, and others.
What If I Have To Photograph A Smaller Piece Of Jewelry?

Go for the macro lens and mirrorless DSLR camera set. Moreover, set the aperture to the correct settings. Focus on the earring piece while the camera is placed on the tripod. Furthermore, the earring should be in focus before you start clicking images. These are the best way to photograph earrings that are much smaller and more intricate. 

Conclusion

Learning how to photograph earrings for sale can make a huge difference in your projects. Whether you are doing it at home or for professional projects, it’s essential.

Better jewelry images attract a higher amount of visitors to your product page. It helps you to improve conversion alongside.

According to many case studies, improving product image directly relates to increasing eCommerce platform sales.

Thus, you must put your effort into making the quality of the product images a better one. 

Follow our guidelines and create a jewelry photography setup on your own.

Emma Rivett

Emma Rivett

Author

“Emma Rivett is a brand photographer and copywriter who has a strong tendency to prepare, change and teach. Her photographic works were published in Uppercase, Travel + Leisure, Gayot Guide, Paula Deen Cooking, Design Guide, the NHOME Magazine, Urban Home, etc. Helping creative businesspeople create an online brand and PS”

No Comments

Leave a Reply

Quick Response

Email:
cs@theclippingpathservice.com

Hotline Support:
Mobile:       +1 (718) 717-2362