Product Photography Lighting Techniques

7 Product Photography Lighting Techniques [Complete Guide To Nail It!]

When it comes to product photography, lighting is always the major key component. Without perfect lighting techniques, your product image will either be unattractive or uninspiring. Of course, that is not desirable in the e-commerce business! 

With the blessing of lighting techniques like small lights for accenting, backlighting for dramatic images, and many more, you can have an attractive product image.

So to get photography that can stand out in the ecommerce business, you need to know the perfect product photography lighting techniques. Whether you are an amateur or a pro, these techniques can greatly help you. So to get it all, read on!

In the e-commerce business, product photography is everything. Either it can keep the business floating or sink. 

So the importance of learning how to play with the lights for perfect photography is nothing new. 

That is why, here are seven different lighting techniques for product photography that you can try in your next shot.

1- Use Smaller Lights To Accent Your Products

Okay, you have your products and have set a brand. Now you need beautiful product photographs to showcase your product best among the competitors. 

You know, for attractive product photography, it is all about manipulating the light. 

In the way that you can make the image eye-catchy by getting some actual dimension to the image or adding some highlights. You can use small lights to accent your products or side areas to focus them. 

So to add a little kick to your photography, place the accent light behind or front of the product and off to one side.

2- Backlighting For A Dramatic Image

Backlighting can add a dramatic silhouette effect to the photography of your product. 

You know, when you are taking a backlit image, most of the lights come from the background. 

Clicking a perfect product image using backlighting can be a little tricky. But once you adopt the method, you can click an attention-catching image for your business product. 

You can also use natural lights for backlighting the image. Choose the time of morning or evening for using natural lights as backlights. 

It is the time the sun rises or sets, giving a spectacular effect on the product photography image. 

You also need to choose a camera setting for the backlit product photography like a wide aperture anywhere from f/2.8 to f/5.6. 

Shutter speed should be between 1/100 and 1/640 with an ISO around 100. You ought to slightly overexpose the image for a good product photograph.

3- Work With White Foam Board To Enhance Highlights

So essentially, if you are using a white foam board, it will help you enhance the highlights of your product. It is an excellent budget-friendly product photography trick. 

It is no secret that the white foam board bounces light back onto the scene. The white foam board makes a big difference in the photography depending on the position you place it in. 

Professionals like to use this board as a fill light while taking product photos or videos. 

After a perfect clicking, a little editing can make a sky difference, you may also know it. 

In this matter, our The Clipping Path Service is best among all. Let’s be honest here; the Clipping Path Service is an expert in product photography with all lighting and editing techniques. 

Their techniques give the product image more excellent quality light, make the image more stunning, and eliminate the harsh shadows. 

Don’t just trust my words. Try their service to know it yourself!

4- Use Black Foam Board To Enhance Shadows

In product photography, sometimes you need some light to be absorbed for taking realistic photos. That time the black foam board comes into play. 

If you wanted to enhance your product shadows, you would actually use a black foam board to do the trick. 

Black foam board prevents the light from bouncing onto the subject deepening the shadows.

5- Off-Camera Flashes For Better Lighting

Flash is a good choice for having an eye catchy image for your brand product. It gives a consistent-looking impression of the product. 

If you use your Android or phone’s flash for this job, the light source will dim, and the image will be harsh and unattractive. 

Rather than that, you can use off-camera flashes more strategically to have total control over the image. 

6- Use Modifiers For Special Effect

Lighting modifiers are assumed to be an essential tool for product photography. It helps to get the desired color and feel of the product image. 

The light modifiers assist you in highlighting a part of the image or drawing attention to something in the picture. 

You can use the modifiers with the diffusers to uniquely affect the product photograph. 

But if you are using the color gel as a modifier, ensure the color scheme of the gel does not clash with the color of your product or your product logo. 

However, let us explore some essential light modifiers for excellent product photography shots.

Soft light modifiers 

  • Photography umbrellas;  
  • Soft-boxes;  
  • Scrims;  

Hard and directional light modifiers 

  • Beauty dishes;  
  • Snoots;  
  • Barn doors;  
  • Grid;  
  • Flags;  

Creative light modifiers 

  • Gobos and pattern;  
  • Color gels;  

7- Compositing Image

Compositing images is one of the most advanced techniques used by professionals like our preferred The Clipping Path Service. Through this method, you can achieve perfect lighting for the entire picture. 

In compositing images, two or more images are combined to create an attractive and optimal one. 

You only need one flashlight to shoot the photo.

Bonus: Ideal Lighting Arrangement Techniques For Product Photography

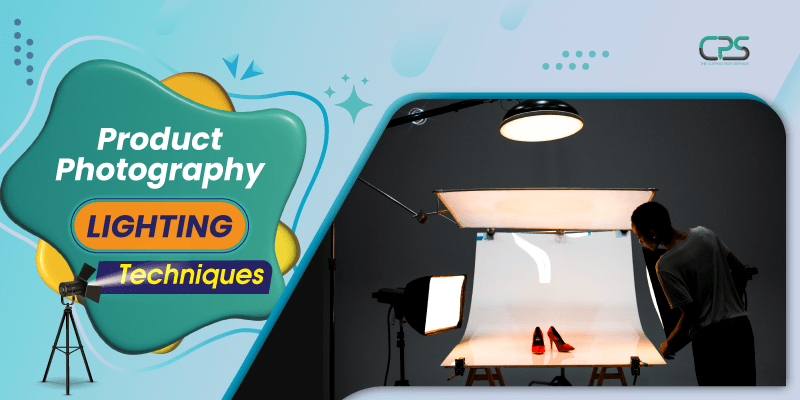
The key factor of product photography lighting is to ensure the object stands out from the background and has enough brightness. 

But the truth is that some products happen to be very reflective while shooting, whereas some backgrounds annoyingly bounce light. 

Here the lighting arrangement techniques can do the trick. Following are the very effective lighting arrangements for your product photography. 

#1- Ring Light For The Front Lighting 

Ring lights are suitable for product photography. The best advantage is that it exposes every part of the object separating from the background. 

For front lighting the object, it is a good choice. But you should keep in mind that the ring light tends to be brighter and may need diffusers for most cases. 

You may find it challenging to have a perfect image of brightly colored products. 

So the best way to have product photography with a ring light is to keep it at a distance from the object. 

The further the light will be, the softer the effect. It is not as harsh as the spotlight, but still, it is a good way to go. 

#2- Overhead Light Creates The Atmosphere 

The overhead lights uniquely create an atmosphere of moody shots of the darker object. 

When taking photos of your darker products, you can use the overhead lights to attract the attention of the customers in seconds. 

Use octagonal softboxes to create a moody atmosphere. It comes with adjustable heads. 

You can tilt down the softboxes for the overhead lighting for the product photography. 

#3- Front Light Is Always A Simple Choice 

In product photography, the front light is commonly used. It is always a common and simple choice for photographers. 

But still, you can even take an eye-catchy product image if you use the front light correctly. You just need to consider a few things. 

The front light makes a little separation between the background and the object. So ensure the background is not too flashy. 

Keep the front light at eye level with the object in the setup. If the light is bright, try to dim it down. Use a fast lens for shooting and a low aperture [about 1.8 aperture]. 

Raise the ISO and the shutter combination a notch or two. Your setup is ready! Go for shooting. 

If your product is reflective, the setup is not for you. The other lighting setup described below can do the trick here. 

#4- Dual Lights For Shooting Reflective Products 

In reflective products, center lighting is troublesome. In this case, dual lights have come with the solution. 

You can use two lights for full coverage of the object. Place them on the sides of the object to eliminate reflections. 

While using dual lights for product photography, you need to adjust for even lighting based on the size and shape of your product. 

Yes, this is easy to do. You will see how continuous lighting can make a lot of difference in the product image through the technique.

#5- 3 Lights To Capture All The Details 

You see the dual light setup for the reflective products. What if your product is non-reflective, and you want to capture all the details in the image? 

Then the three light arranging techniques make sense. You can place three lights around the object to highlight every fact of your product in the image. 

But be careful of positioning the lights according to the shape of your product. 

#6- Triangle Setting Emphasizes The Shape 

The triangle lighting setup works well with product photography and still life photography. This lighting setup goes up with a variety of products. 

As the name emphasizes, it means to keep the lights in a triangle shape. You can get evenly lighting around the object. It is an excellent way to go for your product’s beautiful and three-dimensional look. 

First, lighten up the front of the object using triangle light. Put a little backlight to isolate the product more dramatically from the background.

#7- 3 Lights Separate Background 

In product photography, when the object stands out beautifully from the background; it becomes more eye-catching. 

So what to do if your product image blends too much with the background? Then you need a slight modification in the triangle light setup. 

The triangle light arrangements can also help in separating the background. You need to put two light sources facing on the wall instead of the back of the product.

#8- Natural Light For Soft And Even Lighting 

Feel free to use natural lighting for your product photography if you have no studio lighting setup. 

The soft and even lighting of nature can also assist in getting a stunning product image. 

You can take advantage of the light coming from the window. Use curtains as diffusers to create an effect. 

But use these techniques only when the sunlight is gentle. Harsh lights can overexpose your product rather than a beautiful image. 

Choose a time when the sunlight is soft like it is at the time of sunrise or sunset. You will find more even lighting for your product photography at that time.

Bordie Capron

Bordie Capron

Author

“Bordie Capron is a Sr. Content Maker who is working in The Clipping Path Service an US-based image and video post-production company for over 7+ years. She completed her degree in graphic designing and worked as a graphic designing expert for several years. She always loved writing”

No Comments

Leave a Reply

Quick Response

Email:
cs@theclippingpathservice.com

Hotline Support:
Mobile:       +1 (718) 717-2362