Which Lighting Direction Is Used To Create Silhouettes

Which Lighting Direction Is Used To Create Silhouettes

As a photographer, you might wonder which lighting direction is used to create silhouettes? In reality, you have some neat tricks to create movie-like outlines. 

Like, you could place simple lighting right behind your subject. It would be enough to create a silhouette image.

But, to get a perfect-looking silhouette, you need to follow some of the basic rules. Nevertheless, countless photographers have found it working and seamless.

Follow these steps, and you will be all set to capture one of the beautiful sets of silhouettes. 

Right in the article, we will talk about it in detail step by step. Let’s get in.

The definition of the silhouette is a shape of the object, people, or animal with a single solid color against a brighter background. For the most part, the color of the solid shape is black. Silhouettes are one of the most popular photography effects.

Anyone can create silhouettes with sunlight or artificial light. Nonetheless, if you can’t find a better place to create silhouettes, create one with artificial lighting. But, you need to set up the right direction of lighting to create perfect silhouettes.

Lighting Direction To Creating Silhouette

Lighting Direction To Creating Silhouette

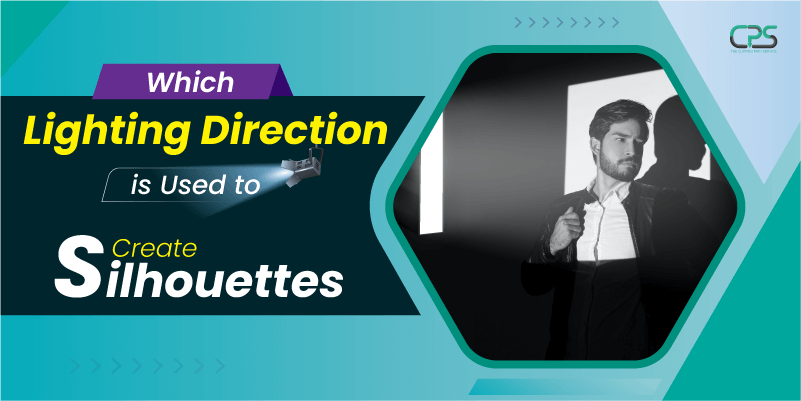
Below we are talking about the direction to create a silhouette. These steps are crucial and essential to creating great silhouette images. These steps can lead to a better-looking silhouette even if you don’t have proper natural sunlight. So let’s jump right in. 

Step 1: Turn Off All Of The Room Lights

To create a better-looking silhouette, you need to turn off all the lights in the room. Turning off the lights will help you create a better silhouette. Your silhouette stays clean and clear as all the unnecessary lighting gets off.

Turning off all lighting lets you direct light according to your wish. In turn, you get an amazing-looking silhouette. However, it’s only the first step to creating perfect lighting direction to create better silhouettes. 

Step 2: Get a White Sheet 

Right now, arrange a white sheet that you have to use to create silhouettes. For instance, place a white sweep to create a plain background. Getting a proper background would fasten your silhouette creation process. 

Even though the white sheet works great, try out other color sheets. Make sure to place the sheet vertically, and it provides you with the perfect background to create a silhouette. Again, the good quality of the sheet can help to create better silhouettes.

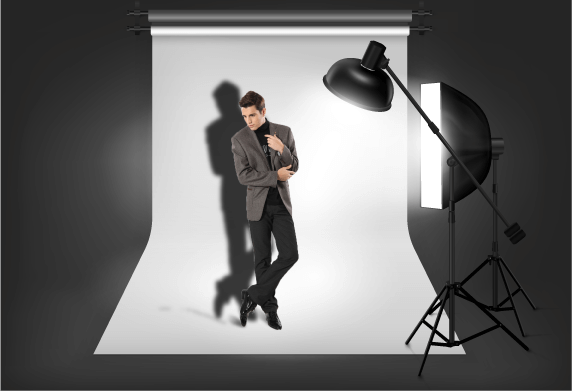
Step 3: Setup Your Lighting

At the current step, set up the lighting for the silhouette. These lighting would determine how well your silhouettes in photos. Hence, as lighting, use any LED or softboxes. Afterward, place the lighting right behind your subject. It creates a fantastic silhouette on your camera.

Point to two different lights at the center of your white sweep as an alternative. It provides you with a perfect highlighted area. Then, call your photograph model to stand in front of the highlighted area. As a result, it results in a great-looking silhouette. However, it might create an overexposure problem which you may need to fix with a little bit of photo editing.  

Step 4: Put A Top Light Above Your Subject(Optional)

To add another dimension to your silhouettes, add additional lighting above your subject. Doing so would create an additional layer of lighting around the silhouette. Again, it helps the subject to stand out from the background. But it’s a completely optional step. 

Thinking about setting up the lighting, use a stand to harness the lighting. Or you could order someone to take lighting and stand beside your photography subject. If you want to place the lighting higher, the person can stand on a stool to get the height it needs. 

Equipment For Creating Silhouettes

When discussing equipment for creating silhouettes, you only need good quality white sheets as background and LED lighting. Plus, use any kind of light such as softbox and umbrella lighting. These are the only pieces of equipment you must have to create fantastic silhouettes. 

But, aside from lighting and the background, you may need a decent camera. It could be a DSLR or a mobile camera, to be specific. Either way, make sure to configure it in the right way to capture its contrast. 

Tips To Improve Silhouettes

To improve the silhouettes effects on your camera, start tweaking your camera settings. For example, increasing the camera’s contrast can lead to cleaner silhouettes. Plus, optional steps like adding top light can help to highlight your subject. 

Apart from the camera settings, use lighting diagrams to create creative lighting. Lighting diagrams are clear drawings of the lighting setup you are creating. Creating a diagram would make it easier for you to create better lighting within a shorter period. 

Editing of Silhouette

Let’s be honest; most of the amazing silhouette photos are edited, so editing images of silhouettes is a lot important to achieve perfection. Below we are talking about a few editing steps.

  • Edit the brightness and contrast of the photo. Plus, make sure to adjust the saturation as well.
  • Adjust darker and highlight part of the image with levels in Photoshop.
  • If the background sky or the surface color seems odd, you could color correct the image to extract the actual color of the image. 

Note: It’s better to remember that you need photo editing software like Photoshop to create and apply these edits. If you feel a bit skeptical, hire a professional photo editing service.

Frequently Asked Question

Let’s talk about these questions, which may come on when you take silhouette images. These would be a great option for you to better understand silhouette photography. 

How To Create Silhouettes Under Sun?

Use golden hours as a timeframe to shoot silhouette photos. Golden hours typically are one hour after sunrise and one hour before the sunsets. Perhaps, you should use the sky as background and start shooting photos of your subject. It would create a perfect silhouette. 

How Many Lights Should I Use To Create Silhouettes?

The best option is to use only one light right after the subject of your image. But, in an alternative case, you can set up two different lights pointing at a single point on the white sweep. As an addition, you could add a light at the top of your subject. 

Should I Use A Reflector To Create Silhouettes?

It’s not mandatory to place a reflection to create a silhouette. But, you could use it to add more volume to your subject. As the light bounces off, it gives you a great effect on your silhouette. You should place the reflector behind your subject only. 

Conclusion

Enough of wondering which lighting direction is used to create silhouettes; now you know it. Hence you need better preparation to create professional silhouettes as you see in advertisements and movies.

Make sure you dedicate enough time to learning the basics of silhouette creation. These are elegant and timeless effects that are useful in depicting ideas. 

Don’t let the fumbles get you at the beginning; everything will be working in harmony once you take the first silhouette image. 

Be sure to keep on trying, and you could capture a movie-like silhouette that stands out even in crowds. 

Bordie Capron

Bordie Capron

Author

“Bordie Capron is a Sr. Content Maker who is working in The Clipping Path Service an US-based image and video post-production company for over 7+ years. She completed her degree in graphic designing and worked as a graphic designing expert for several years. She always loved writing”

No Comments

Leave a Reply

Quick Response

Email:
cs@theclippingpathservice.com

Hotline Support:
Mobile:       +1 (718) 717-2362